Saturday, November 27, 2010

Get on a Budget and get healthy

There is nothing more old-fashioned or important to sustainable living than being on a budget (living within our means). My wife and I have struggled to get on a family budget for years now. We are not extravagant spenders, but we are typical Americans who like to eat out occasionally, buy our kids stuff, have decent cars, and vacation a couple of times a year. Our budgeting process has allowed us the opportunity to prioritize what is important to our family, as we allocate our limited funds. I won't discuss how to get on a budget as that has been written about by many more qualified people than me. I want to share all the additional benefits of being on a budget that have been a pleasant surprise for our family. At first it was a struggle to limit ourselves and control our spending urges, but with time, we realize that being on a budget is beneficial to us in many ways non-fiscal. Fiscal responsibility has led us to be more physically active, spend more time together as a family and limit our unhealthy habits.

Lord knows that staying out of the bars and consuming less alcohol is good for any marriage/family/liver. I will still do an occasional happy hour with friends, but the bartenders no longer know me by name. One thing that I need to figure out is how to get my friends to do healthy activities with me that do not involve sitting around drinking beer. Either that or I need to get some new friends that are also on a budget. I have never been a smoker, but I am amazed at how many people waste a huge chunk of change on cigarettes every day. How many smokers could save thousands of dollars a year by not smoking? Do I need to mention that this is also healthy for your body? I was buying three gas station sodas a day when my debit card was wielded freely. I was consuming about 1000 calories of sugar water and who knows what other chemicals. Even diet soda is a huge waste of money and has all kinds of chemicals and artificial sweeteners that can't be good for me. Now when I need a caffeine boost, I have iced tea.

A quick analysis of our spending clarified that we were spending too much on eating out. I would eat out nearly every day at work and our family would eat out several nights a week in the evenings. Now I bring my lunch to work. A couple of sandwiches, fruit and yogurt is so much better for me than a burger and fries. I have lost 10 pounds. Our family is way more healthy eating at home in the evenings. An additional benefit is time together as a family at the dinner table each night.

We were spending $60 a month on Satellite TV. That's $720 a year. That is just about the cost of the tree house I am building with my son. We have found the library again and it is still free. We read books instead of wasting time with a Nintendo or X-box. It is sad how many kids waste their lives playing video games when there is so much beauty out there to be explored.

Being on a budget has forced us to limit our consumption. Birthday presents are less expensive and fewer than pre-budget years. My wife is not a shopper (thank God), but our kids have gotten caught up in the Webkinz craze, and they have way more toys and clothes than they could ever use. It seems like our family used to spend our weekends shuffling stuff around our garage and/or storage room or picking up the house with all the clutter we used to buy for the kids. Now our home is manageable because we have less stuff. Extra stuff is a waste of time. Simplicity is not items to buy to organize your life, it is simply having less stuff.

When gas was over $3 per gallon, I tried to become a bicycle commuter. I really enjoyed the few times I biked to work and may try to become a regular bicycle commuter in the future, but the twenty mile round-trip was more than I can handle at this time, mostly due to time constraints and kids activities after school. For people who live closer to their work, I would highly recommend this healthy way of saving money. It makes you feel like a kid again.

Vacations are closer to home which helps us support the economy of our own state as opposed to a trip to Florida or Colorado. Less time in the car and more time hiking, canoeing, swimming and biking. When we do get back to Colorado we will be camping instead of staying in an expensive cabin. When in Colorado aren't you supposed to get closer to nature anyway?

Our mental health is better now that we know we are not adding to our overall debt and we are actually whittling away at it. I can't imagine how amazing it will feel to have a debt free family. Also, I am happy that we are teaching our kids about trade-offs, that they can't have everything they want, and I think they will grow up to be responsible adults with the teachable moments living on a budget provides.

When we first started our budget it became very apparent that we would not be able to entertain in the fashion most of our friends had become accustomed to. Nice bottles of wine, steak and cocktails are expensive. You really get to know who your true friends are when you host with chips, salsa and Bud Light. To be quite honest, I think a lot of people find it refreshing when one couple frees a group of friends from the high standard of expensive entertaining and our friends get together more often now that it is a low brow affair. Most people are in a similar financial situation, entertaining like they have more money than they actually do, and find it refreshing when someone has the courage to lower the standard. Who are we trying to impress anyway? These are supposed to be our friends.

I bet if you evaluate where you are spending your money, you will see that a lot of your money is being spent on items that are not good for you or your family. So take your kid on a bike ride or get familiar with a nearby State Park. It's free and it's healthy!

Monday, October 25, 2010

Harvesting grapes and making juice

Some grapes are very difficult and require a lot of chemical applications in order to have a decent crop. If that is what you want and you don't mind dumping lots of chemicals on your plants, you can probably grow almost any kind of grape you want. My grapes are not beautiful, but they do not have any chemicals on them.

This was our first year of good grape production. Here they are in early summer.


I have several varieties of grapes. I am certain that I have Concords (and they are a good variety for beginners) and I have others that I have taken as cuttings from friends and farmers that are great producers as well.


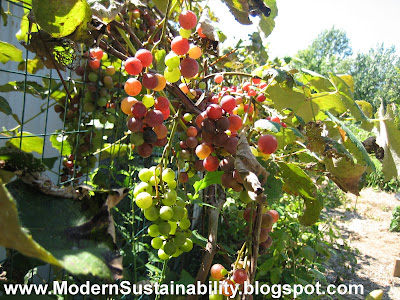
Our first year of really plentiful grape production. I think the vines are about 4 years old (summer 2010).


In about a half hour we have a lot of fruit. In the field we use clippers to cut clusters off. We will later remove the stems and bad fruit.


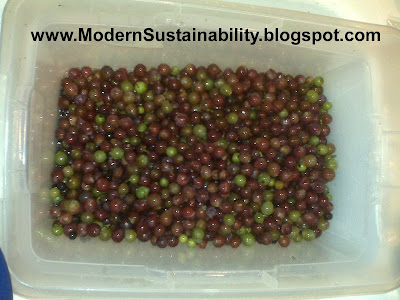
Inside, under the sink, I remove the stems and any bad fruit. Bad fruit usually floats to the top and can be easily skimmed off to discard. The remaining fruit is used to make juice.


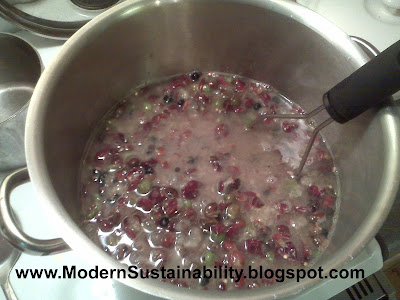
A big metal pot is used to cook the grapes. I place the clean grapes in the pot and add enough water to cover the fruit. I then boil them, reduce to a simmer, and mash them for about 15 minutes after boiling. Some people like to use a juicer to chop up the grapes prior to boiling. This helps, but is not necessary.


The mash is filtered through a strainer to make the juice. Some people like to filter the juice through cheese cloth, which removes all large particles and most of the color. We just refrigerate the juice and drink it fresh for several days. If you want to make wine or can the juice, follow the links below.


Upon completion, there is mash left over.
We filter this many times before discarding the mash.


Pruning Blackberries

Blackberries are one of the easiest berry bushes to get started and are a reliable producer for many years. The only maintenance required is pruning them back to a manageable size every year after harvesting the last berries in August. I have tried many varieties, but I have found no types that are superior to the thornless varieties in fruit quantity, taste and reliability. I wanted to see if the thorny types had better flavor or bigger fruit or any advantage that would justify having to deal with the nasty thorns and I have found no justification, so I have torn out all of my varieties except the thornless ones. I wish I knew what kind I have specifically, but with most of my fruit trees and berry bushes, I go out and talk to friends and farmers and take cuttings of plants that produce well with no chemicals, and often they do not know the variety. If you observe your own neighborhood or the country area around your city you will start to notice trees and berry bushes of all kinds that look kind of neglected (indicating that they are not sprayed with chemicals) yet they have good fruit output. These are the plants you want to choose for cuttings. Click here for info on taking cuttings.


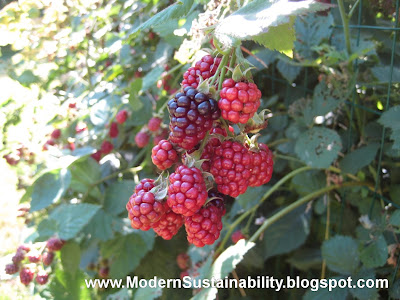
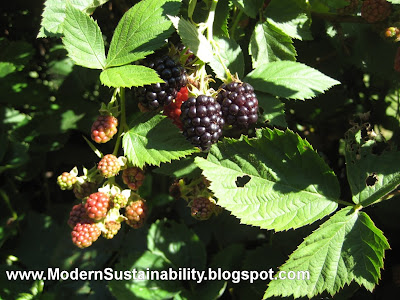
Blackberries a couple of weeks from being ready to pick.

Ready to start harvesting. Blackberries produce for 2-4 weeks.


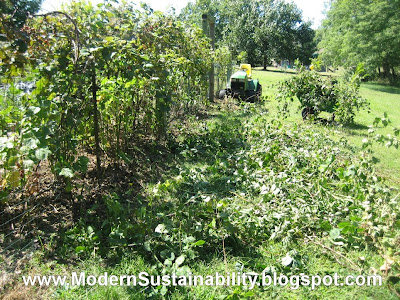
My thornless blackberries grow to be about 12' tall by the end of summer. Notice the 7' high hoop house in the background. I let them grow all summer and prune them back after harvest.


After harvest, I cut all the canes back to about 4' high and specifically remove all the canes that produced fruit this year to the ground. All brambles are different, but blackberries only produce fruit on canes that grew from the previous year so anything that had fruit on it this year will not have berries the next year.


It is easy to tell what canes had fruit, as you will see some of the unharvested seed heads on top of the canes. Cut all of these to the ground and get rid of them. They do not compost well so I burn them. The growth from this season will produce fruit next year. By cutting the shrubs back to 4' after harvest, the canes will have time to put out side shoots and grow to about 6' before fall, thus providing a thick mass of one year old growth that will produce fruit the next year. No home should be without blackberries. Good luck.


Monday, September 27, 2010

How to build a tree house - walls

Here is the drawing I put together to build the walls from. Nothing fancy, but it helped me think about quantities of wood and how I would need to cut the 2x4's to allow for the sloped shed roof.

I built the walls on the ground in my driveway so that they would be square and flat. This is nearly impossible to do on rough ground. Make sure you buy your doors and windows prior to building the walls so that you can make your rough openings large enough for them. I got this solid wood door, two windows and door hardware at our local Habitat for Humanity re-sale store for $27.


We built one end wall with 7' tall 2x4's, the other end with full 8' 2x4's and sloped walls connecting in between. This allows for a shed roof with 1' of fall. Note the slope of the wall leaning against the truck. We tilted the walls up in the driveway to make sure they lined up before we carried them to the site on the back of the truck, hoisted them up one by one and nailed them together. I needed the help of two neighbors to get them to the site, and lift them up to the deck 10' off the ground. Up to this point, the deck and floor joists have all been screwed together, but the walls are just nailed together. The bottom board of each wall is treated lumber, but the vertical studs and top of the wall are not treated as they will be protected by a roof and siding eventually. Up to this point all floor joists, posts and deck boards have been treated lumber.


By having the windows and doors to measure, you can be sure to make your openings the correct width, so that they can be easily installed up in the tree house.


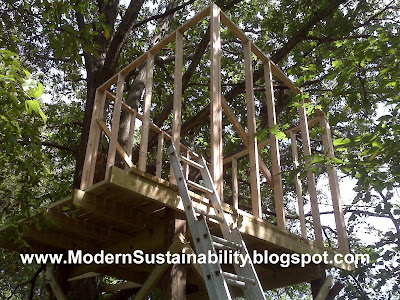
Here are the walls installed up on the deck. It is starting to look like a tree house.


Here you can see the tree house that is approximately 8' x 8' on the 8' x 12' deck so that there is a 4' x 8' deck outside the front door. The angled boards on the inside are used to make sure the walls are square and vertical. They will not be needed when the roof joists and siding are on the outside.


How to build a tree house - supports

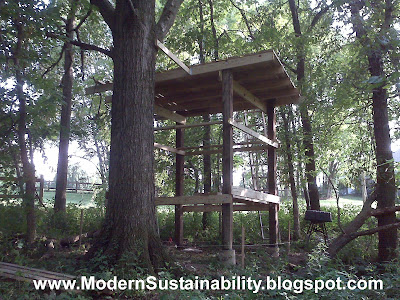
The next step is to install the 6" x 6" x 10' posts to build the upper levels on. You may need some help with this step as these posts can be very heavy. I used recycled posts that had already been in the ground as a retaining wall for 15 years so I did not want to direct bury them. This ought to keep them solid for at least another 20 years as they should not have direct contact with moisture and they can completely dry out after every rain. I screwed a heavy-duty plastic base on each post that has a hole for the rebar to go through in the middle. This elevates the post off of the concrete to further extend the life of the wood post. Some people choose to bury their posts in the ground with concrete around the posts. I did not want to lose the extra 3' of height and wanted to avoid the posts being in contact with constant moisture in the ground.

If you look closely you can see the plastic bases on top of the concrete footing. I used the future deck boards to hold the posts vertical as they were going up.

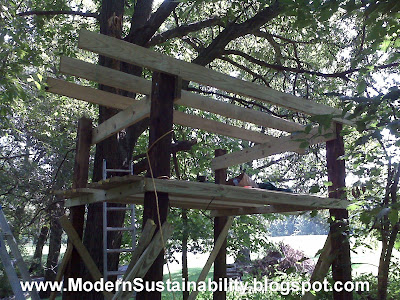
We built scaffolding levels as we worked our way up so that we had a safe place to work from. We used the future deck boards so that we were not having to buy extra lumber.


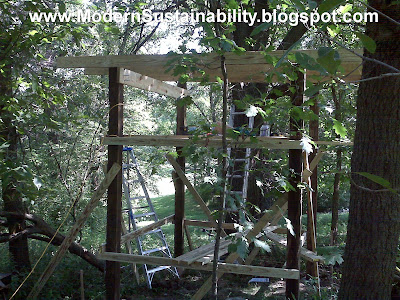
It took us two levels of scaffolding to get up to our 10' high deck level that the tree house will sit on.


The permanent floor joists are bolted in place with 10" x 3/8" bolts. Consult with your local hardware store to see what kind of finish is needed for the bolts with the kind of treated wood you have in your state. For ACQ wood you need galvanized bolts, washers and nuts.


As we build the deck level and the posts become more solidly locked together, the support boards below are removed and used for the upper deck.


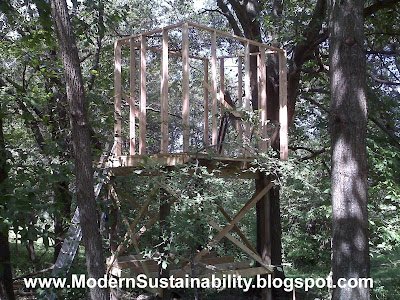
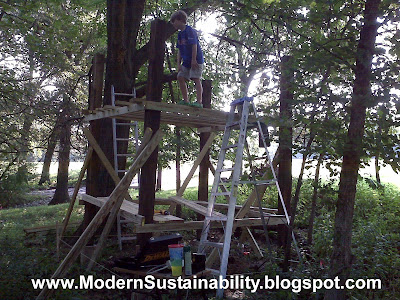
The deck is almost finished and the upper deck is bolted to the tree in two locations for stability. We decided to build a lower level because it was such a cool space below the deck.


The deck is complete with 2' cantilever at each end for a total deck space of 8' x 12' Notice how we decided to add diagonal 2x4x10's to make sure the upper deck was solid as a rock. It was pretty safe before the diagonals, but I wanted to make sure that nothing would move once the house portion was added on top of the deck. The diagonals made a huge difference.


Quite a view from up here! 10' is really high. This represents about two weekends of work.


How to build a tree house - concrete

OK, what does a tree house have to do with sustainability? I am considering this to be a laboratory to teach my kids, ages 6-9, about solar power and energy use. If things go well, it will also be a house heated by wood and cooled by shade and wind. I hope it is a place where they will learn about solar panels, batteries, inverters and how much energy lights and fans use.

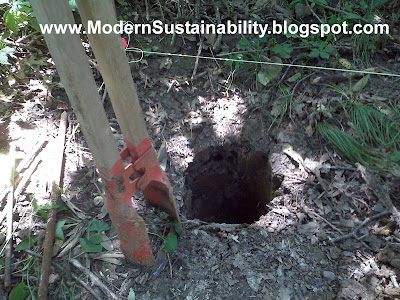
We dug the footing piers as close to safe frost depth as possible and about 12" wide. In central Missouri this is 36" deep. I used a post hole digger (shown above).

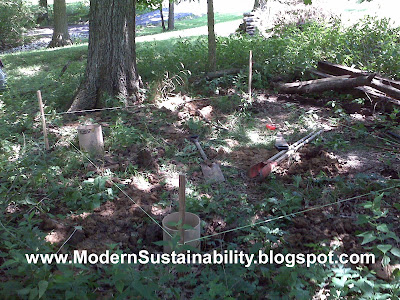
I tried my best to dig the piers 7'-6" on center so that 6"x6"x10' support posts with 8' boards around the outside would create an 8' x 8' square. This makes for an easy deck level with no cutting of lumber later. The stakes and string are used to measure things closely, keep things square and level the footing piers. Remenber A squared + B squared = C squared? Or a rectangle that is 3' x 4' x 5' will always form a 90 degree angle. This will help keep things square.


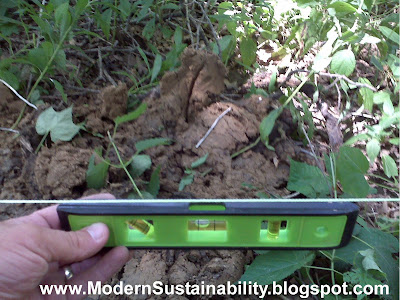
Using a level, I verified that the string line was level all the way around. Because the ground is not level, I could measure the same distance down from the string to the top of the concrete piers and make sure that all concrete is the same height.


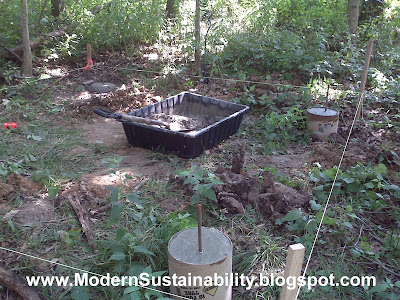
Where the ground was lower, I used Sonotube to elevate the footing form to the height of the holes that were flush with the ground. A plastic tub and bags of concrete were used to mix the concrete in the woods.


We mixed the concrete by adding water from our hose until it was thoroughly wet, but not runny.


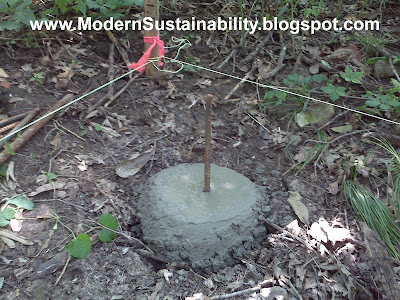
One of the pier footings flush with the ground, troweled smooth and a rebar set in the center. A hole drilled in the posts will secure them to the footing later. This is 18" rebar that is 1/2" thick (9" in the concrete and 9" above ground).


All the concrete poured to the top of the forms and/or flush with the ground as measured from the level string line down to the concrete uniformly.


Another view of the concrete in relation to the Oak tree. Our tree house is stand alone from the tree, but later on we will attach the deck level to the tree.


Wednesday, June 23, 2010

Other edible fruit and plants


Gooseberries are my kids favorites and what other fruit is available in May and June? They are sour, but this native fruit is great in pies or just as a snack when we are out hiking.


That is a happy smile. My daughter loves gooseberries.


Another Missouri native is the Persimmon. A beautiful tree and a prolific producer of fruit. The fruit is not ready to eat until late fall, usually after frosts have begun. If you eat them too early, they will make your mouth pucker. We have used them in jam or eaten fresh.


A good harvest from a single tree.


In the late fall all the leaves have fallen and only the fruit remains.


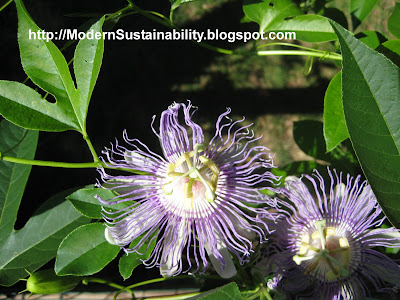
I think the prettiest flower I have ever seen is the Passion Flower. It has so many layers of depth it almost looks artificial. This is a Missouri native vine that can be aggressive, but who cares if this beautiful flower is everywhere? To control it's spread, I do plant it along fence rows where I mow on both sides because it will sucker up 10' from the original plant. If you plant it on a garden fence or near a landscape bed, it can be a nuisance weed.


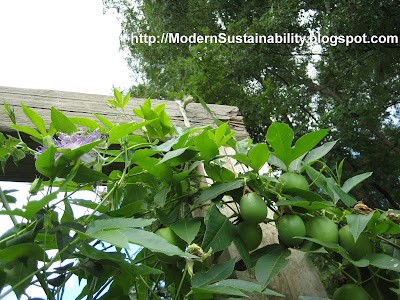
Here the fruit is developing. When it turns yellow you can peel it and suck the juice out of the inside. I am not sure what the relationship is to the passion fruit drinks you can get on tropical islands, but the taste is very similar. Kind of citrus, and very sweet.


Our native Redbud is a beautiful small tree with pretty heart shaped leaves and pink flowers in the spring. It does well in shade or sun and is very tough and adaptable to various soils.


The flowers are great to eat on salads or freshly grazed from the tree. The seed pods, when they are young and tender, can be eaten like snap peas or cooked with salt and butter.


Spring berries and fruit trees

This has been a great spring for us. Most of our fruit trees are still young, but our berry bushes are producing very well. The following are some photos and comments on what is doing well and tidbits of what we have learned. We have had a lot of Japanese Beatles this year. I am trying to figure out a natural method of destroying the little devils other than physically removing and squishing them. Any ideas are welcome in the comments.

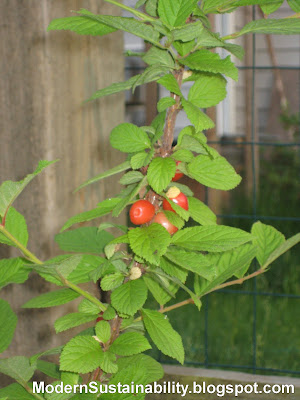
Sour bush cherries have beautiful spring flowers and produce lots of small, sour, red fruit that is well suited for pies or fresh eating if you don't mind the sour taste. So far this is doing well (3rd season) without any spraying and has been disease and insect free. Japanese Beatles don't seem to fancy them over the grapes, fruit trees or blackberries.

This is the first year our bush cherries have produced (3rd season in the ground). The fruit is small and sour, but seems disease and insect free thus far.


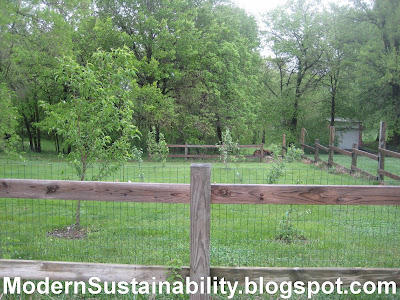
Our small developing nursery (inside our dog fence). This year (2010) we have some peaches, nectarines, and crabapples developing fruit.


Our grapes (mostly Concord) are doing well. They have all reached the top 6' wire and I am starting to train them and trimming (in Nov.) lower growth off. It is important to get them off the ground so that they have good air movement to discourage fungal disease.


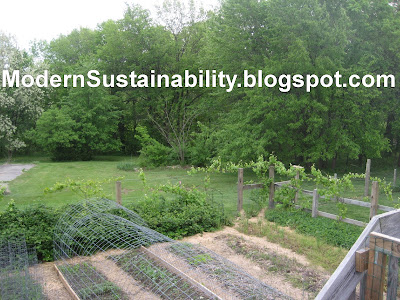
Early spring with grapes and blackberries leafing out. Spring greens have been planted in the hoop house, but there is no need for shade clothe until mid-May when it gets hot.


Grape leaves healthy as can be before the Japanese Beatles start eating them.


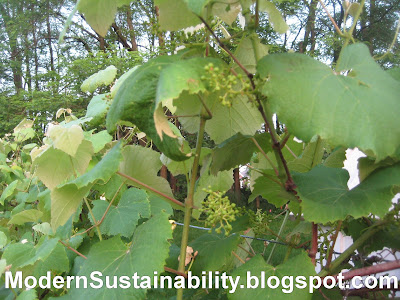
Fruit starting to develop on the grape vines. Concords seem to be the most disease variety for mid-Missouri. We also have some seedless varieties, but they don't seem to be very vigorous or productive yet.


Blueberries in early spring.

There is nothing finer or prettier than blueberries. No house or garden should be without them. They are easy and productive if you have a little patience. They are disease and insect resistant, are beautiful plants and the fruit is super healthy. I often recommend to friends that all gardens should have blueberries, blackberries and strawberries. All are very hardy, productive and healthy for eating.


Blueberry flowers are a beautiful dainty white.


Developing fruit in May.


Fruit starting to turn blue. I can hardly wait.


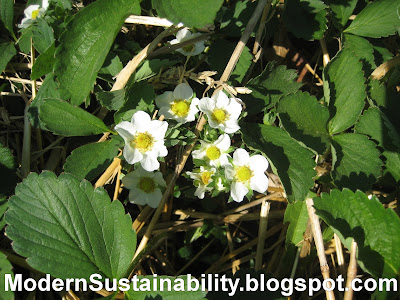
Early spring strawberry flowers.

Strawberries are outstanding. They grow like weeds, but are a beautiful groundcover for any sunny area. They can take shade, but do not produce as well. I have tried many different varieties, but I would stay away from "ever-bearing" types as they bear very little and so it is difficult to process them as they fruit at different times and produce very little. It is nice to have a huge harvest for 3 weeks that we can pick, clean and freeze. Try to keep your beds less than 3' wide as it is hard to pick the berries on the inside without stepping on the outside plants to get to the inner berries.


These beds are a little wide and the edges need to be trimmed. The outer plants can be given away to friends.


Fruit staring to develop.


Beautiful ripe fruit.


Quite a harvest. We wash, cut off the bad parts and freeze the berries on baking sheets. After they freeze individually on sheets, we put them in freezer zip-locks until we can use them in smoothies or jam.


A perfect fruit.


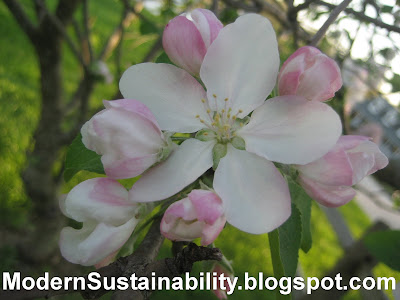
Apples in bloom are beautiful. I am still experimenting to see what varieties I like best.


A beautiful apple blossom.